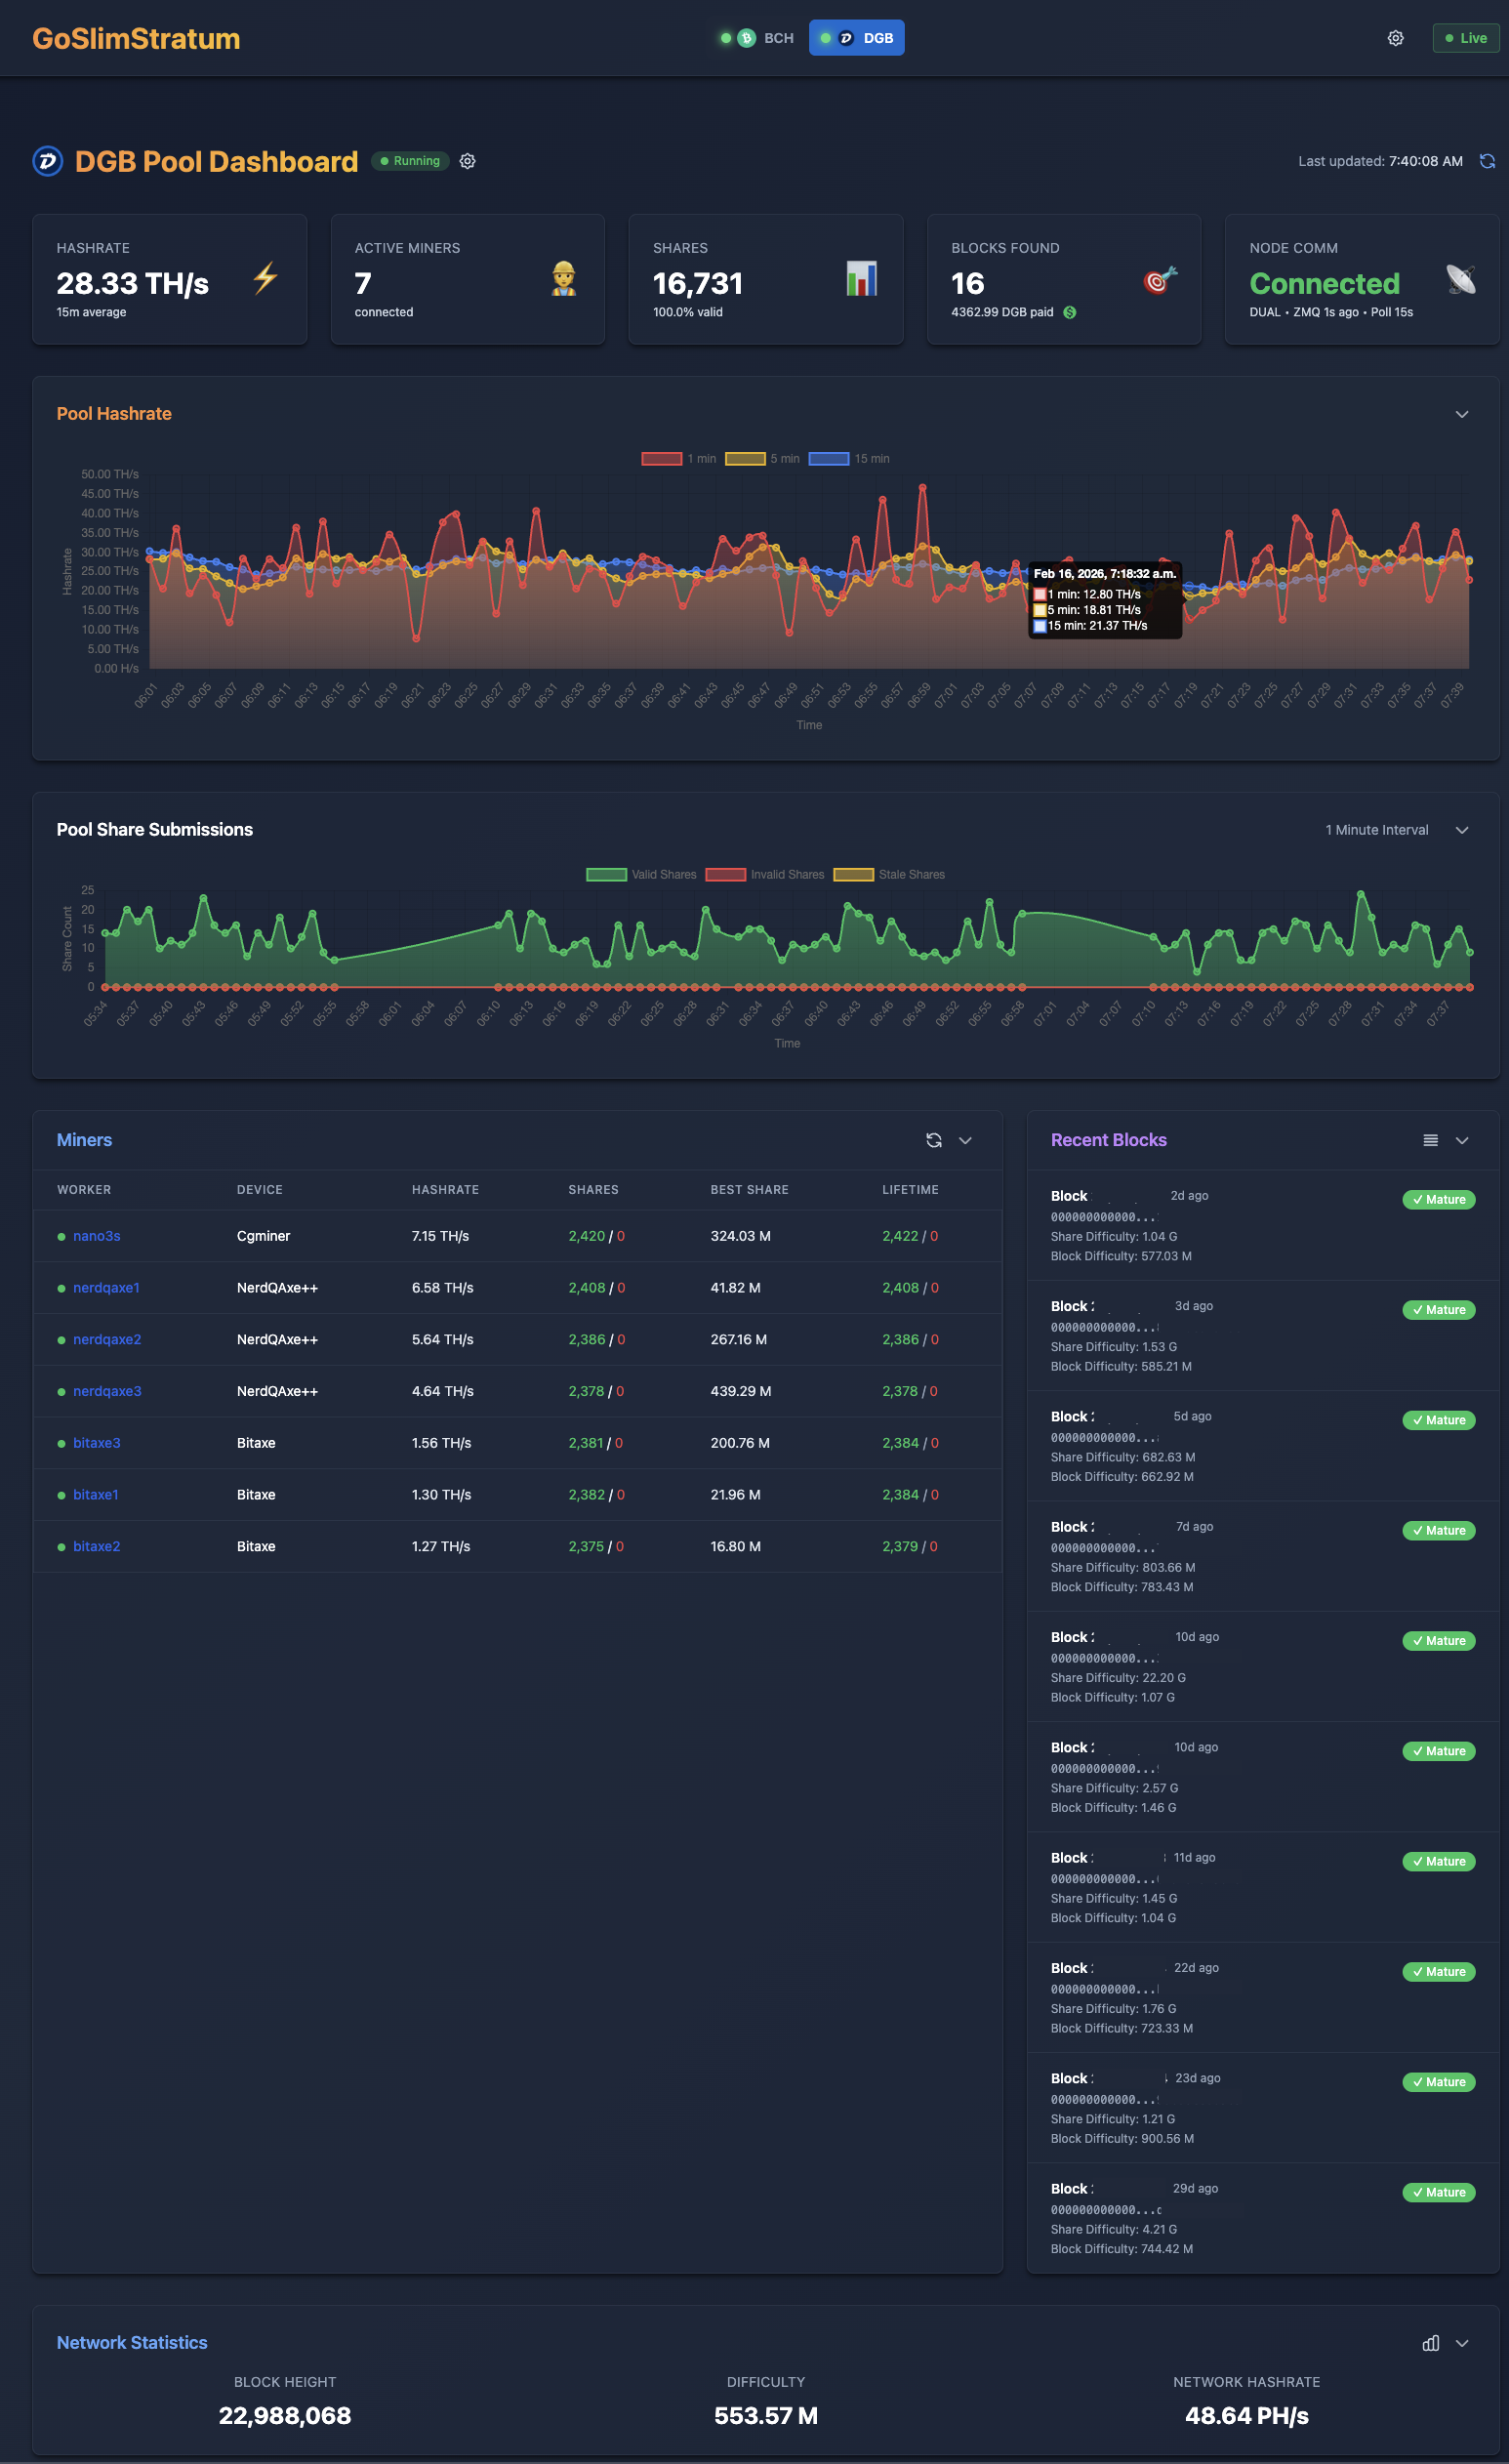
GoSlimStratum (GSS)
Lightweight multi-coin, multi-algorithm Stratum solo mining pool server written in Go. Now with Stratum V2 (BIP-324 / BIP-340) running side-by-side with classic Stratum V1 on the same pool. 7 coins, 4 algorithms. Under 20 MB RAM with native ARM64/AMD64 binaries.
- Stratum V2 — BIP-324 / BIP-340, encrypted & authenticated, runs alongside V1
- Multi-Coin, Multi-Algorithm (BTC, DGB, BCH, XEC, BC2, LTC, DOGE)
- VARDIFF Auto-Difficulty
- Built-in Web Dashboard
- Automated Payouts
- ASICBoost Optimized (BIP320)
- Notifications
- Web UI Configuration
- REST API (20+ endpoints)
- Direct-to-Miner (DTM) coinbase payouts
- Merged Mining (LTC → DOGE) with per-miner coinbase on both chains
- Built-in Block Explorer
- Pool Topology Visualization
- Automatic Node Failover
- Battle-tested to 14+ PH/s on minimal hardware
- Handles 1,000s of simultaneous miners
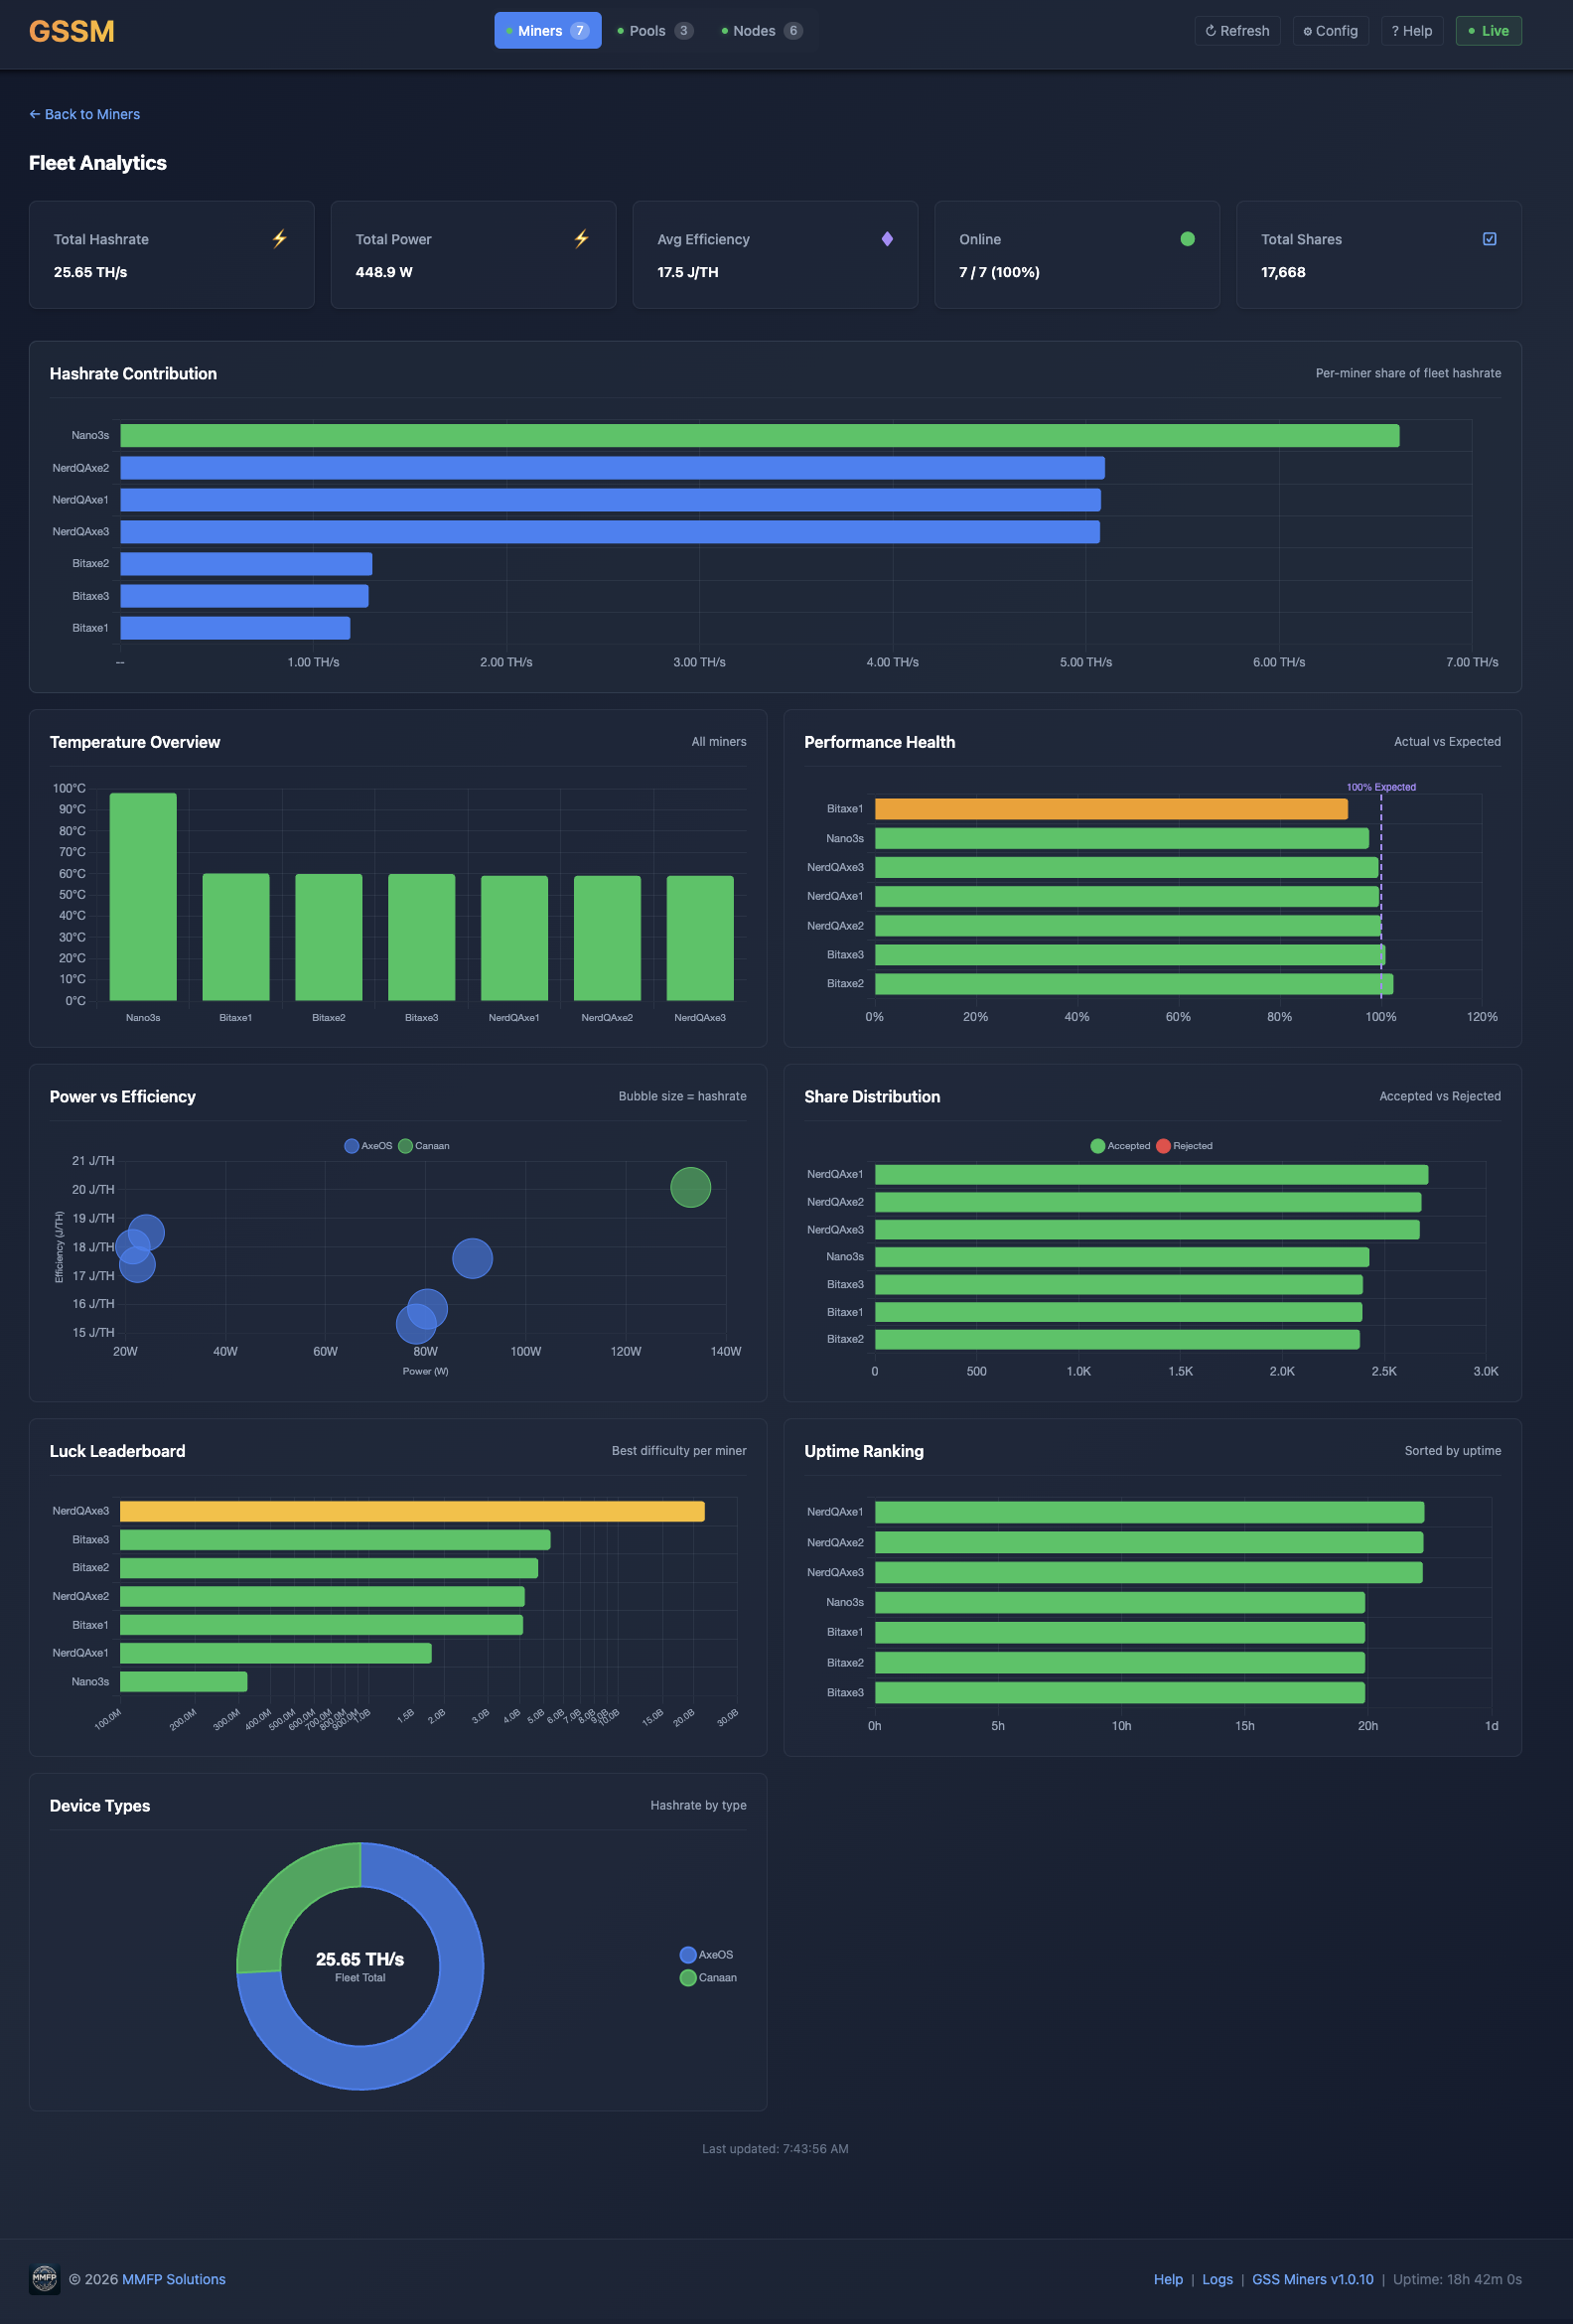
GSSM
Fleet management and monitoring for all your miners. Supports Bitaxe, Antminer, NerdQAxe++, Nano3s, AvalonQ, and more.
- Fleet Analytics Dashboard
- Multi-Miner Support
- Discord / Bidirectional Telegram / Email Notifications
- Miner Analytics & Monitoring
- Pool & Node Analytics & Monitoring
- Temperature & Power Tracking
- Logs Viewer
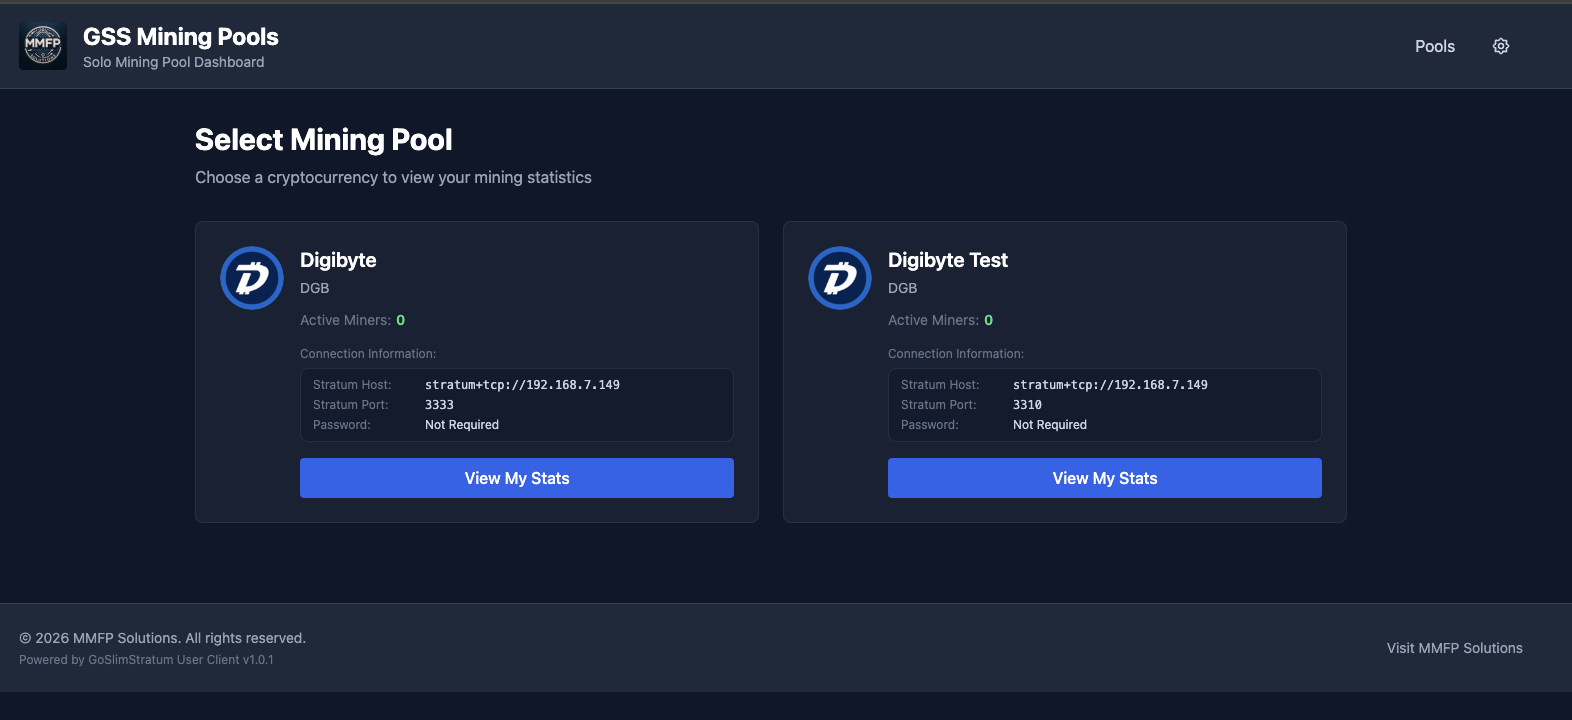
GSSUC
Web-based miner client for GoSlimStratum pools. Let miners check their own stats, blocks, and earnings from any browser.
- Pool Selection
- Miner Dashboard
- Network Status
- Multi-Coin Support
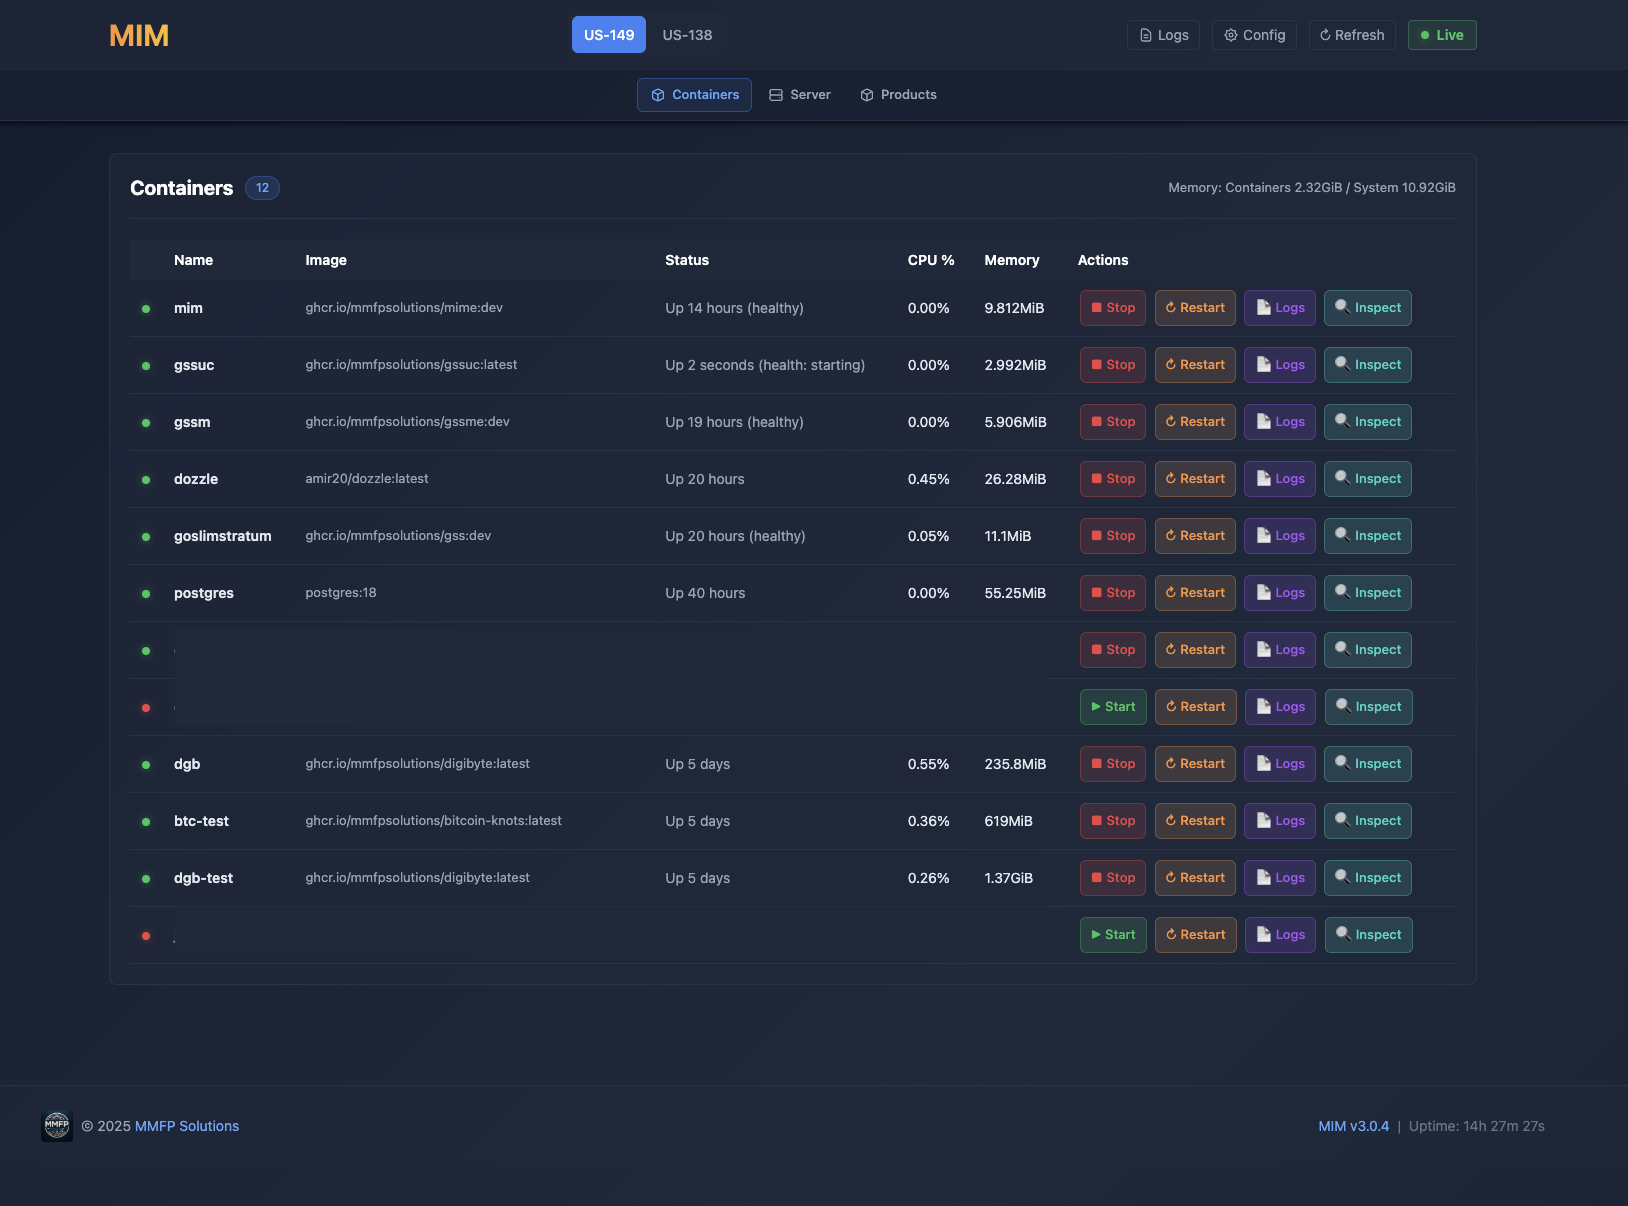
MIM
Mining Infrastructure Manager. Web-based Docker management and server configuration for your entire mining stack.
- Container Management
- Server Terminal
- System Updates
- Configuration Editor
- Product Management, including Updates
CLI Installer
Complete mining infrastructure in 15 minutes. One script installs everything you need to start solo mining.
- One-Click Deploy
- Includes GSS + MIM + GSSM + PostgreSQL + Blockchain Node
- Docker Compose Orchestration
- Ubuntu 24 / 25